
Rain barrels serve so many purposes for your yard! They’re environmentally friendly, they save you money, and they help keep a fresh storage of water for you to use in your garden, and so much more. So, instead of going out and buying one, here’s how you can make your own with some helpful tips from Better Homes & Gardens.
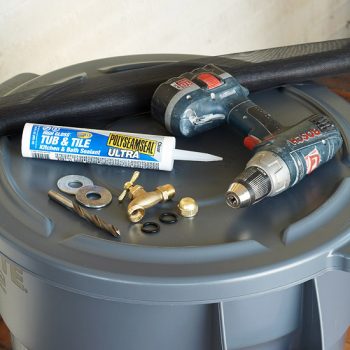
Obviously, the first thing you need to do is gather the supplies for your rain barrel. What you’ll need is: a plastic garbage can, a tube of watertight sealant (or plumping Teflon tape), 2 rubber washers, 2 metal washer, a hose clamp, a spigot, landscaping fabric, and a drill!
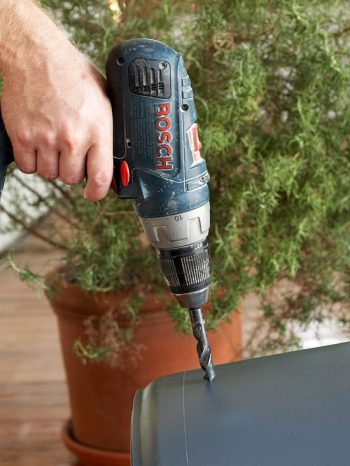
Once you have those collected, take your drill and make a hole near the bottom of the can or barrel. The drill needs to be the same size (or smaller) as the spigot.
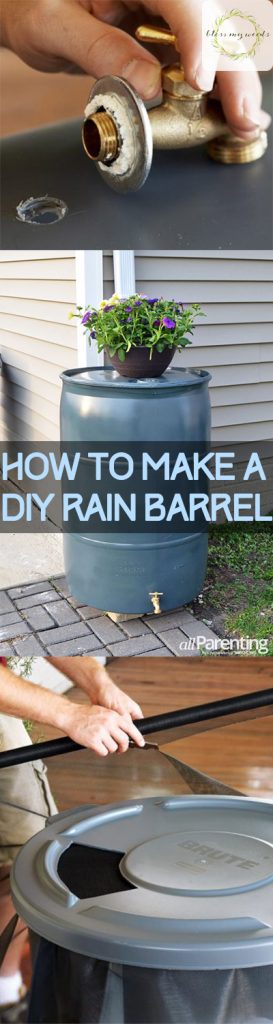
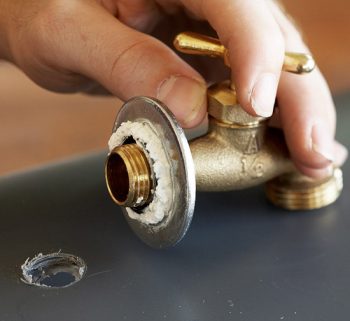
After you make the hole, it’s time to add the spigot. Before you insert it, you need to add the metal washer followed by the rubber washer so it can be held in place.
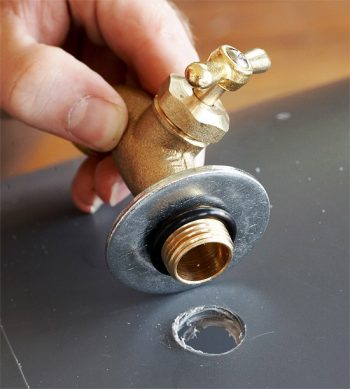
Take your sealant, add a drop around the rubber washer, and then push the spigot into place and make sure it’s tight until it dries. Take your other metal and rubber washers and attach them on the inside of the spigot inside the barrel. Finally, secure the spigot with the hose clamp.
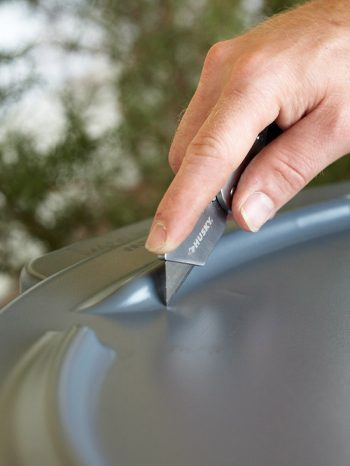
Now that you have the spigot in place, cut a hole in the lid of the barrel. This is where the downspout will meet the barrel, allowing water to fill it. If you’re worried about overflow, then drill holes into the side of the barrel near the top so water can spill out, if needed.
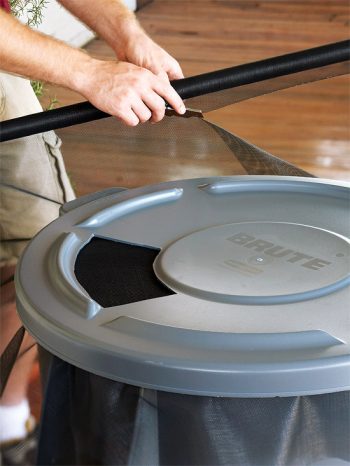
To keep mosquitos and other insects out of your water, stretch the landscaping fabric across the top of the barrel and then tightly attach the lid. This should hold the fabric in place and keep it tightly secured. All that’s left after that is to put the rain barrel under your down spout!
Leave a Reply